Generating Your Connector
This tutorial will help you get started building Mule Cloud Connectors and Modules with the DevKit by showing you how to build a simple cloud connector and integrating it into your application.
Completing this tutorial should take about 30 minutes. You will accomplish the following:
-
Learn basic DevKit concepts
-
Create a basic connector with a Hello World operation
-
Import the connector into Mule Studio and for use in applications
To complete this tutorial you’ll need to:
-
Have Maven 3 installed and understand the basic concepts
-
Be proficient in Java programming
-
Understand how to use the command line and Eclipse or IntelliJ
Getting Started
The DevKit makes it easy to get started by generating a connector for you. This can be done by typing the following command in your Windows Command Prompt or Unix shell:
$ mvn archetype:generate -DarchetypeGroupId=org.mule.tools.devkit \ -DarchetypeArtifactId=mule-devkit-archetype-cloud-connector \ -DarchetypeVersion=3.3.0-RC5 -DgroupId=org.hello -DartifactId=hello-connector -Dversion=1.0-SNAPSHOT \ -DmuleVersion=3.2.1 -DmuleConnectorName=Hello -Dpackage=org.hello \ -DarchetypeRepository=http://repository.mulesoft.org/releasesThis command takes several parameters which you can change depending on your particular connector:
| Name | Description |
|---|---|
muleConnectorName |
The name of your connector. |
package |
The Java package for your connector classes. |
artifactId |
The Maven artifactId of the connector. |
groupId |
The Maven groupId of the connector. |
Once you run this command, you’ll be prompted to ensure that the above parameters are correct. Type 'Y' and hit enter. Afterward you will see that it has generated a project for your connector in the hello-connector directory!
Importing the Connector into your IDE
The first step after creating your project on the command line is to import it into your favorite IDE. We show the steps for Eclipse here. If you’re an IntelliJ user, see Writing Extensions in IntelliJ
Prerequisites
Your new cloud connector is generated as a Maven project. So you must have the Maven tooling for Eclipse installed first. Follow the m2eclipse installation guide to install the Maven tooling.
Importing your project
-
Start Eclipse and set up a workspace for your cloud connector if you haven’t done that already. (Make sure your workspace does not have a space in the directory path)
-
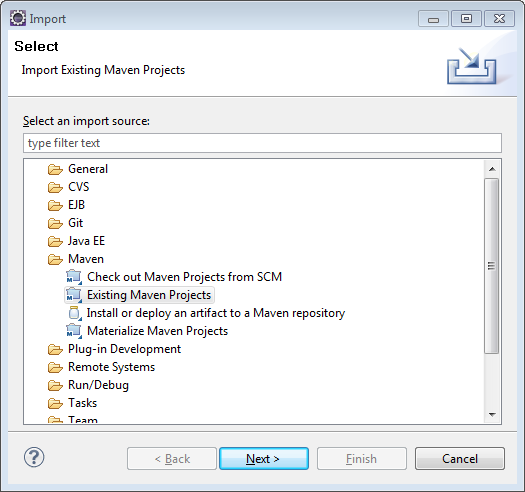
In the workbench view, choose File > Import …
-
On the next dialog, select Existing Maven Projects from the Maven section.
-
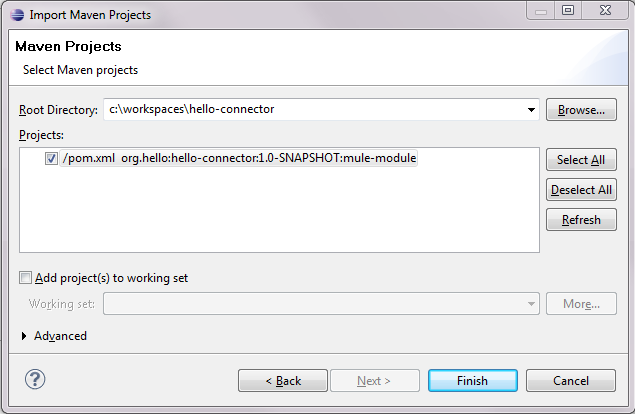
On the next dialog navigate to the new cloud connector project.
-
Click Finish to import the project into your workspace.
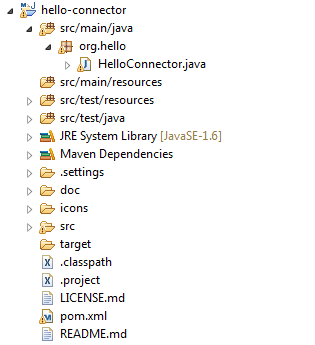
Building your project for the first time may take a long time since the Eclipse Maven integration will download all the required libraries from the internet. By the time the Maven tooling for Eclipse has finished building your project it should look like this:
Updating your project
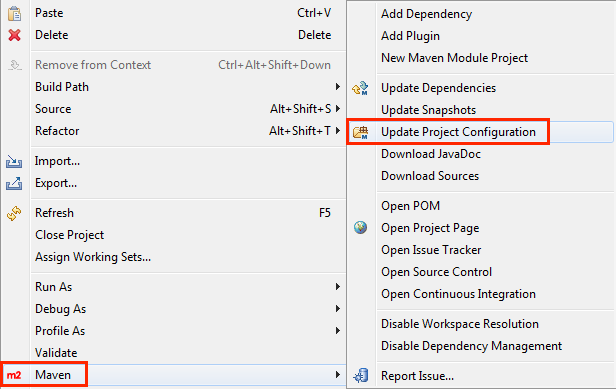
The Mule schema and namespace handler for your cloud connector are automatically generated by the Maven build. The Maven tooling for Eclipse, however, does not perform the full build every time you save the project. As a consequence you have to manually update your project every time you add or remove methods to your cloud connector class. Right-click on the cloud connector project and from the Maven submenu select Update Project Configuration.
Your First Connector Operation
Connector operations wrap up connectivity to external systems or some logic into a simple call that your application can make in it’s flow. We’ll start with a simple operation which simply changes the payload to "Hello Joe".
An operation is simply a method call with annotations from the Mule DevKit. Here’s an example which creates a customized Hello:
/** * Says hello to someone. * * {@sample.xml ../../../doc/Hello-connector.xml.sample hello:say-hello} * * @param name The name to say hello to. * @return The hello message. */@Processorpublic String sayHello(String name){ return "Hello " + name;}@Processor dictates that this method becomes a message processor in a Mule flow. The "String name" will get turned into an attribute that can be specified as a parameter to the message processor.
Here’s an example of what your Mule XML will look like:
<hello:say-hello name="Joe"/>The DevKit also makes it so you can substitute expressions into the parameters to your operation, so you can extract data from the payload:
<hello:say-hello name="#[groovy:payload.name]"/>Each operation is required to have documentation associated with it. This ensures that your end users understand how to use your connector correctly. As part of this, you must add a sample XML snippet for your end users. This will show up in your generated documentation. To do this, open the "hello-connector/doc/Hello-connector.xml.sample" and add the following:
<!-- BEGIN_INCLUDE(hello:say-hello) --> <hello:say-hello name="Joe" /><!-- END_INCLUDE(hello:say-hello) -->
|
To disable the documentation requires, add "-Ddevkit.javadoc.check.skip" to the command line whenever you run Maven. |

Building Your Connector
You’re now ready to build your connector. To do this, go to the command line and run the following command:
$ cd hello-connector$ mvn package -Ddevkit.studio.package.skip=falseThe DevKit Maven plugin will build several different artifacts for you in the target directory:
hello-connector-1.0-SNAPSHOT.jar |
The connector JAR |
hello-connector-1.0-SNAPSHOT.zip |
A Mule plugin which can be dropped into the plugins directory in Mule standalone. |
apidocs |
Generated installation instructions, javadoc, and Mule API docs for your connector. |
Using Your Cloud Connector
Importing your connector inside Mule Studio is easy.
-
Go to the Help Menu and select Install Software
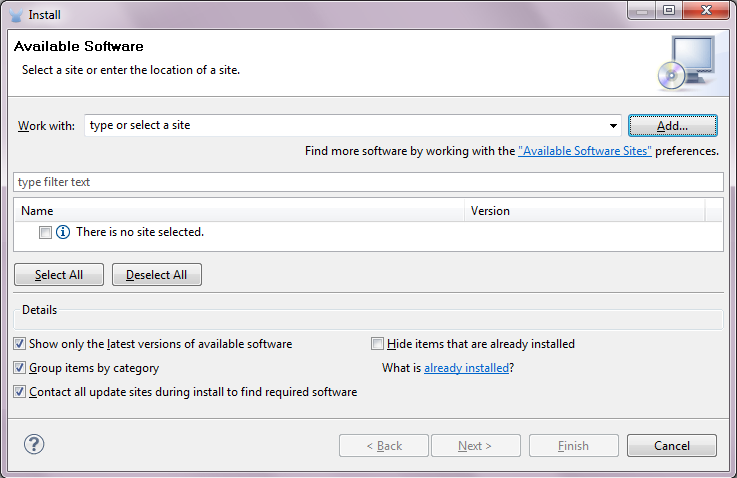
-
Click the Add button to add an update site
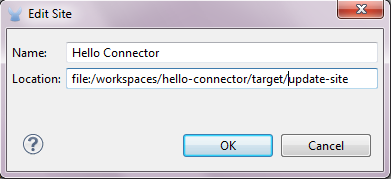
-
Enter a name of "Hello Connector", enter the full path to your connector, prefixed by "file:/", and click OK. (see below)
-
Select the connector from the update site
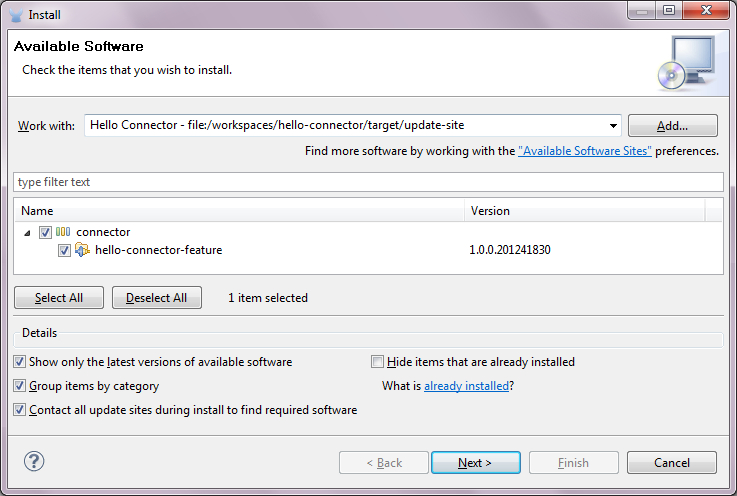
-
Follow the steps to accept the license and restart Mule Studio.
Your connector will now be available on the Studio palette!