Use Flow Designer to Configure a Connector
Anypoint Design Center’s Flow Designer enables you to create apps visually. For more information, see the Flow Designer Tour.
To create an app in Flow Designer:
-
Configure the trigger (source) for the flow.
-
Configure the target component.
Configure the Trigger For the Flow
-
Log in to Anypoint Platform.
-
Click Start designing.
-
In Design Center, click Create new.
-
Click Create new application.
-
Enter a project name and click Create.
-
Click Go straight to canvas to exit from Let’s get started.
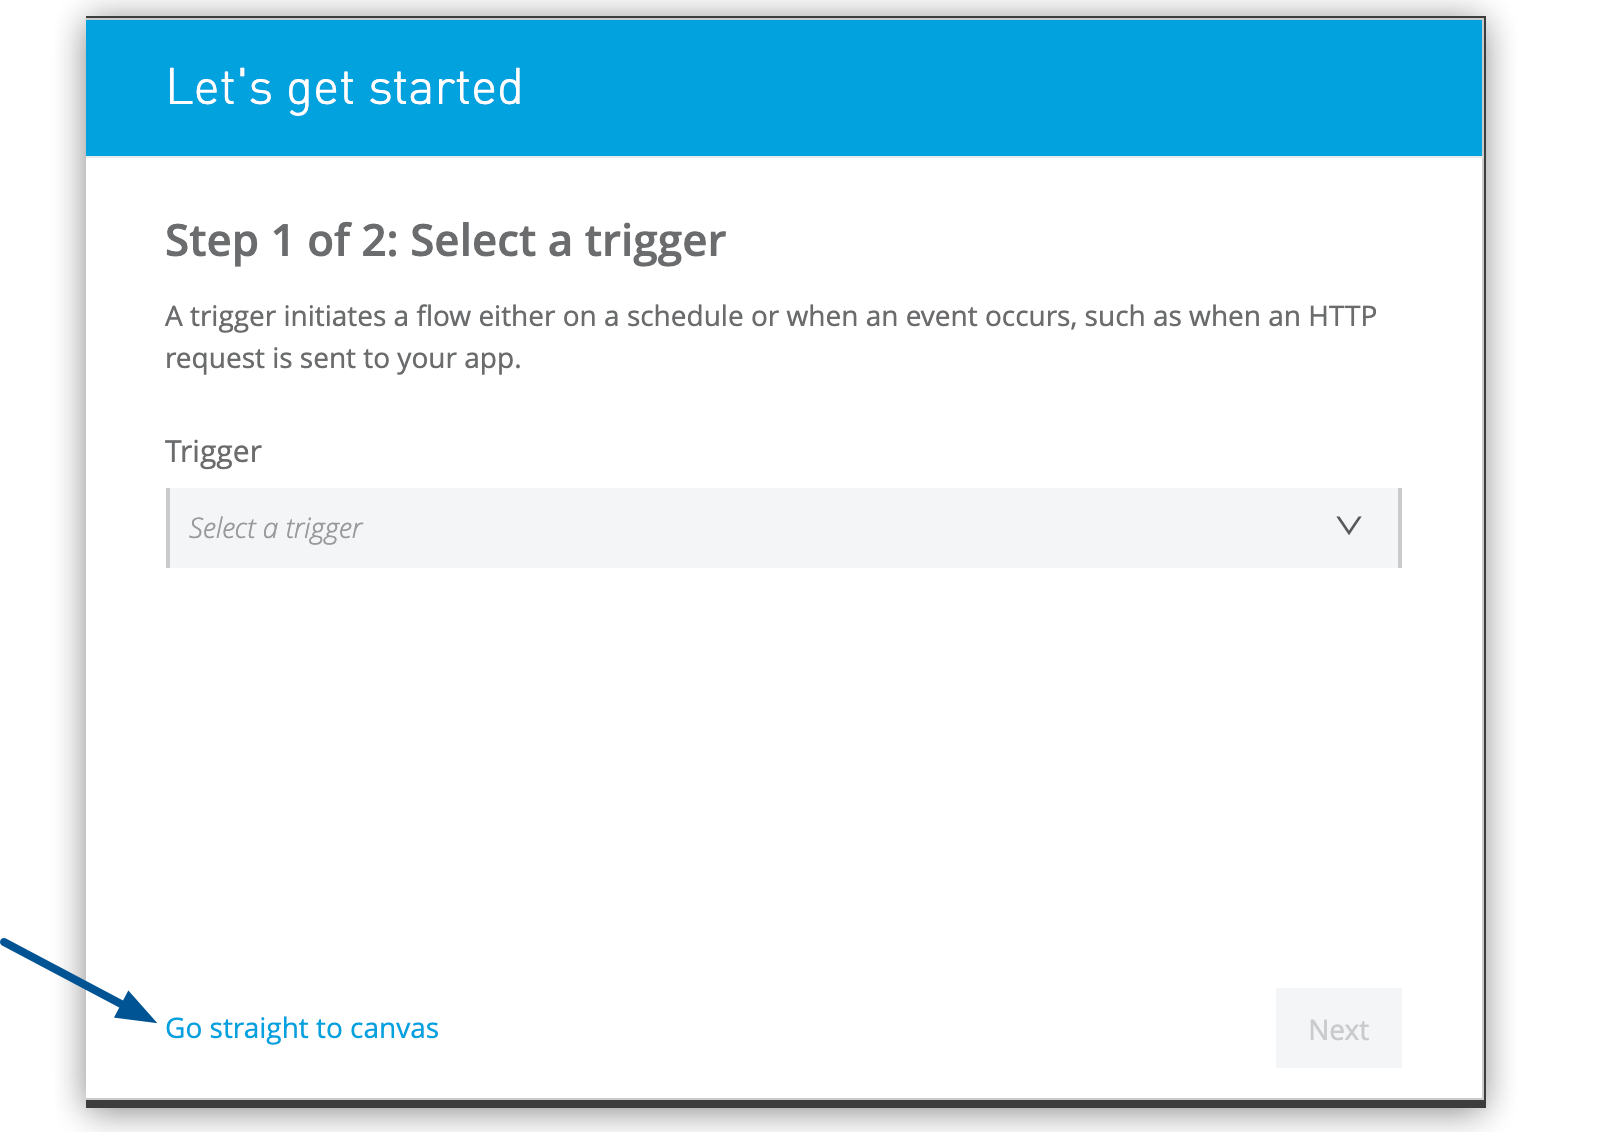 Figure 1. Clicking Go straight to canvas takes you to a trigger card.
 -
Click the empty trigger card in the middle of the canvas to expand it.
-
Configure one of these triggers for the connector:
Use HTTP Listener as a Trigger
HTTP Listener listens for HTTP requests on a specified path and initiates the flow when it receives a request. To use HTTP Listener as a trigger:
-
Follow the procedure described in Configure the Trigger For the Flow.
-
In the Search field, enter
HTTP. -
Click HTTP Listener.
-
In the Path field, specify the path on which
HTTP Listenerlistens for requests. -
Optionally, use the default CloudHub connection, use another existing connection, or configure a new one.
Use the Default CloudHub Connection
The default CloudHub connection uses host 0.0.0.0 and port 8081. To use this connection, click outside of the trigger card to close it after you enter the path.
Select Another Existing Connection
To select an existing connection other than the default CloudHub connection:
-
Click Edit on the HTTP Listener trigger card:
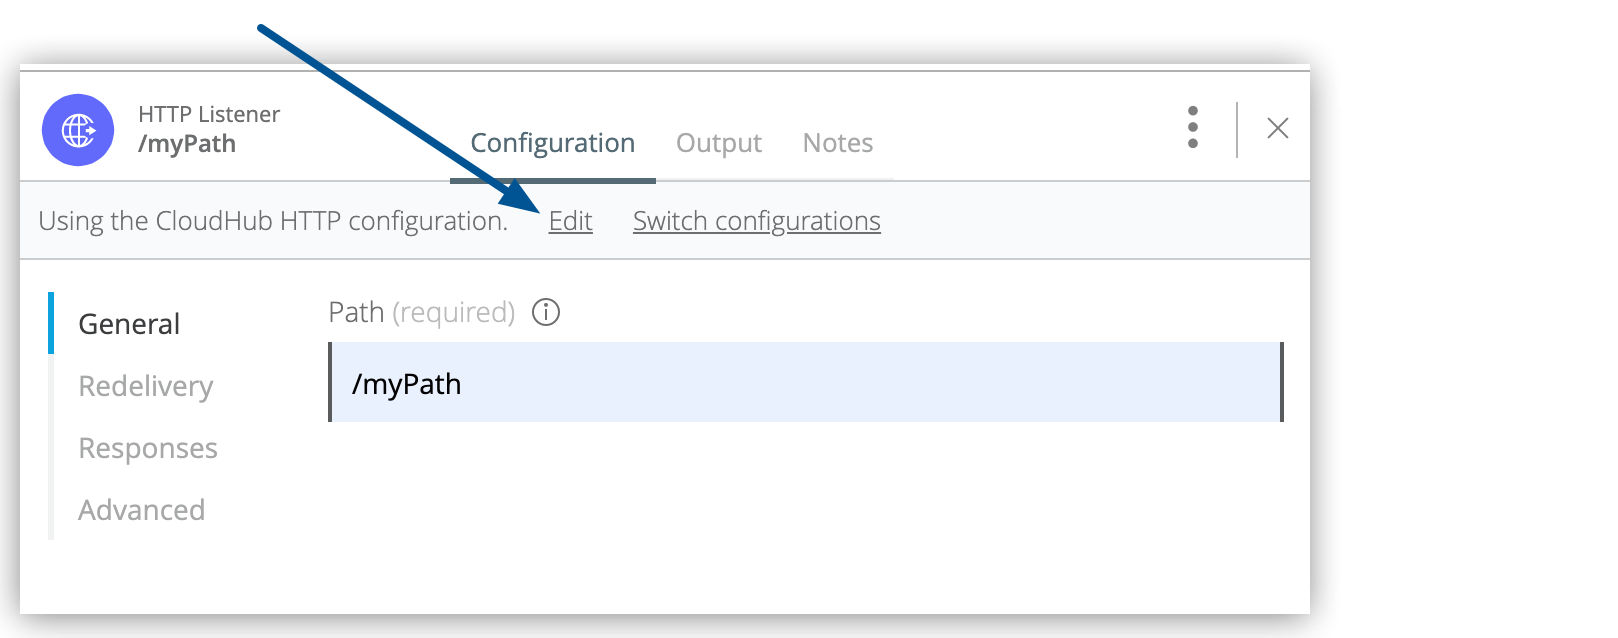 Figure 2. Clicking Edit takes you to a screen where you can configure the HTTP Listener connection.
 -
Select the connection.
-
Click Save.
Configure a New Connection
To configure a new connection:
-
Click Edit on the HTTP Listener trigger card.
-
Click Add Connection.
-
In the Connection Name field, enter a connection name.
-
In the Connection Type field, select Listener.
-
Enter values for the Host and Port fields.
-
Optionally, configure a reconnection strategy and TLS for the new connection.
For more information about configuring HTTP Listener, see the HTTP Connector Reference.
Configure a Reconnection Strategy and TLS for a New Connection
To configure a reconnection strategy and TLS while configuring a new connection:
-
After you enter values for the Host and Port fields, scroll down and click Advanced.
-
Optionally, enable the Fails Deployment field to force the deployment to fail if the connection fails and configured reconnection attempts are exhausted.
-
In the Reconnection Strategy field, select a reconnection strategy.
-
Complete the fields in the Reconnection Strategy section.
For example, this reconnection strategy does the following:
-
Forces the deployment to fail if the connection fails and configured reconnection attempts are exhausted
-
Limits the number of reconnection attempts to three at a frequency of every 5000 milliseconds (ms)
 Figure 3. Use the fields in the Reconnection section to specify reconnection options.
-
-
To configure TLS, scroll down and specify the required information in the TLS Configuration section.
-
Click Save.
For more information about the fields used to configure a reconfiguration strategy or TLS, see the HTTP Connector Reference.
Use Scheduler as a Trigger
Use Scheduler to initiate a flow when a time-based condition is met. You can configure Scheduler to initiate a flow at a regular interval, or you can configure Scheduler to use a more flexible cron expression. A cron expression is a standard for specifying date and time information that initiates a specified action.
To use Scheduler as a trigger:
-
Follow the procedure described in Configure the Trigger For the Flow.
-
In the Search field, enter
Scheduler. -
Select Scheduler.
-
In the Scheduling Strategy field, select whether you want to use a fixed frequency or cron expression to trigger the flow:
For example, the following configuration directs
Schedulerto:-
Wait 10 seconds before initiating the flow for the first time after the app starts.
-
Initiate the flow every 30 seconds after the initial 10-second delay.
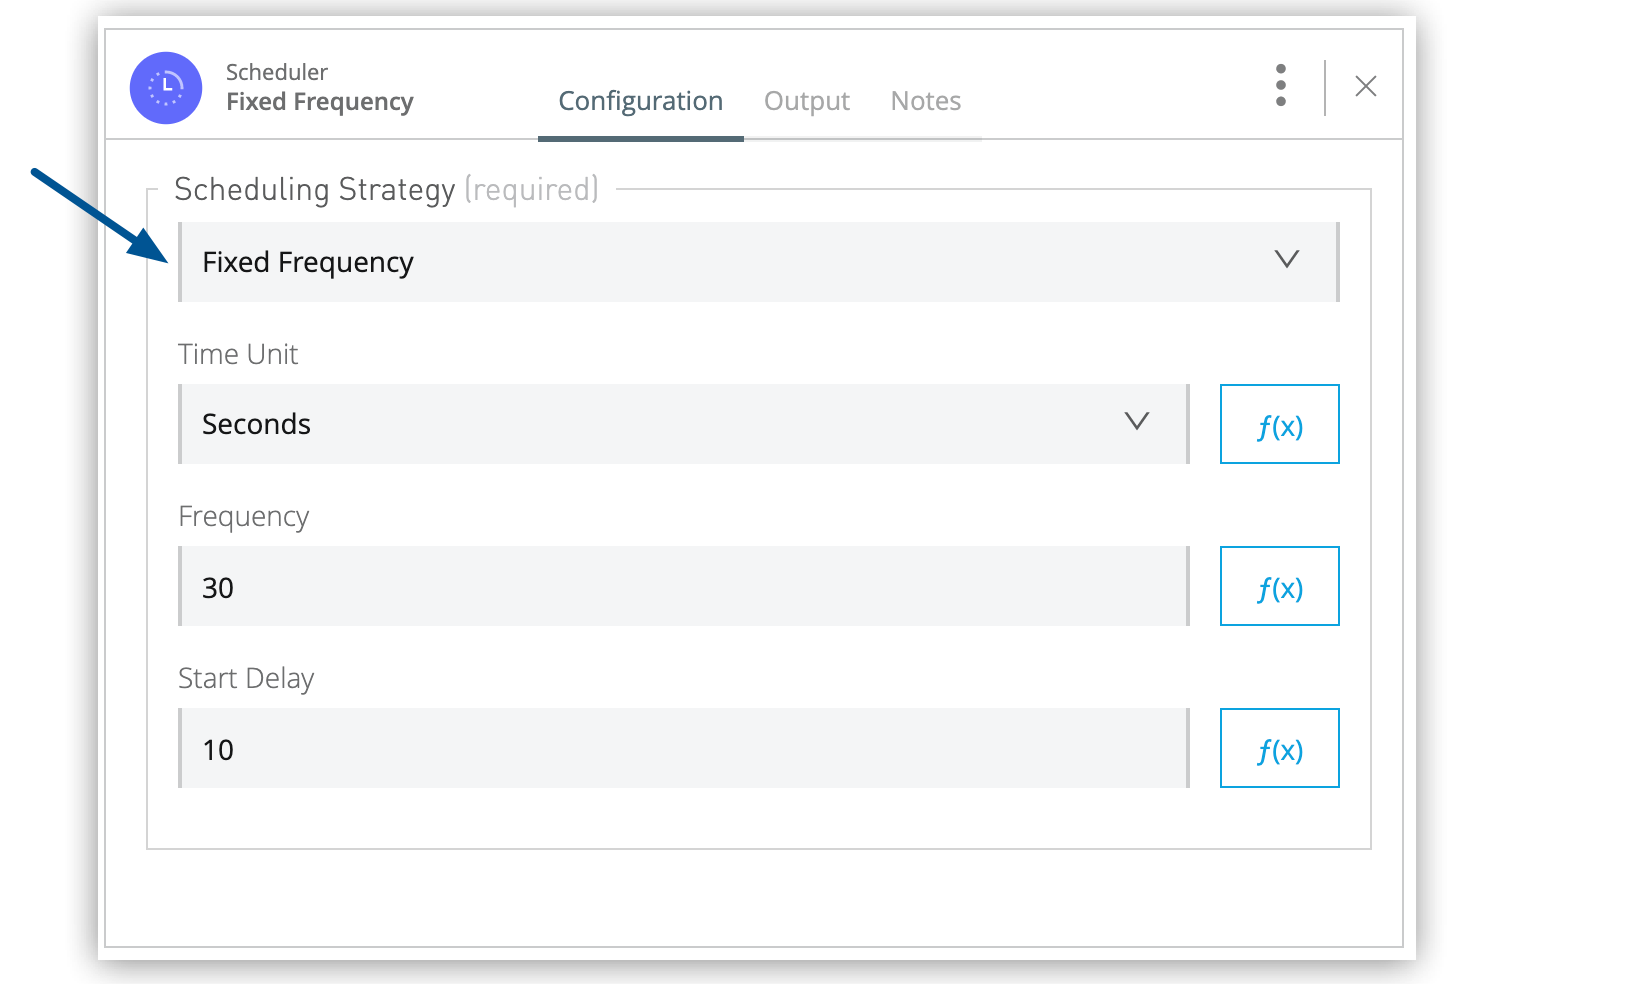 Figure 4. Select
Fixed Frequencyin the Scheduling Strategy field to initiate a flow at regular intervals.The following configuration uses a cron expression to initiate an action every second:
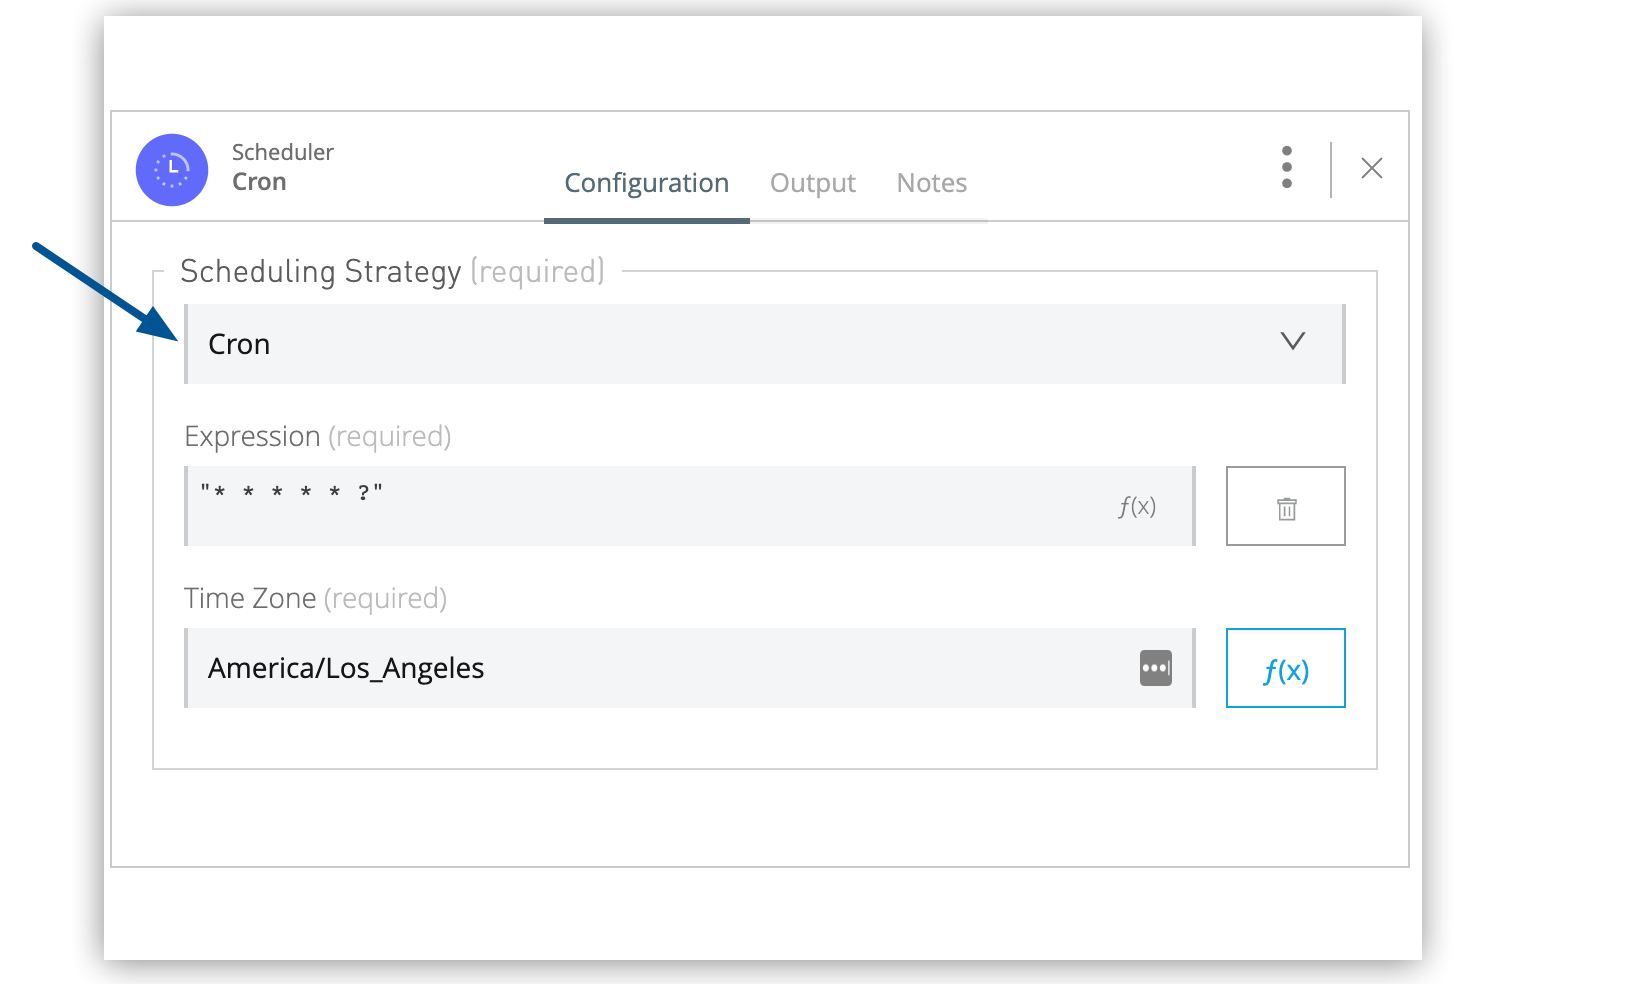 Figure 5. Select
Cronin the Scheduling Strategy field to use a cron expression to specify when to initiate a flow.
-
For more information about configuring Scheduler, see Scheduler Endpoint
Use a Connector-Specific Trigger
If a connector has associated triggers, you can use a connector-specific trigger to initiate the flow. For example, if you are configuring an app that contains an Amazon SQS Connector operation, you can use the Amazon SQS Receive Messages trigger to initiate a flow each time the configured Amazon SQS queue receives a new message.
To start the configuration for a connector-specific trigger, follow these steps:
-
Follow the procedure described in Configure the Trigger For the Flow.
-
In the Search field, search for and select the connector.
-
If the connector has multiple triggers, select the trigger to use. (If it has one trigger, that trigger is selected automatically.)
Each connector-specific trigger has a unique configuration, but most configurations require the following actions:
-
Completing the required fields
-
Selecting an existing connection or configuring a new one
For more information about configuring a connector-specific trigger, see the reference guide for the associated connector.
Configure the Target Component
After you configure a trigger for a connector, you can configure the connector as the target component (step order varies by connector):
-
Click the + icon next to the trigger card.
 Figure 6. Clicking the + icon brings up a screen where you can select the target connector operation.
 -
In the Select a component screen, search for and select the target connector.
-
Select the target operation.
-
Select an existing connection configuration or add a new one.
-
To add a new connection:
-
Click Add Connection.
-
Specify a connection name.
-
In the Connection Type field, select an authentication type.
-
Complete the required fields for the selected authentication type.
-
-
Click Test to confirm that Mule can connect with the specified server using the configured authentication.
-
Click Save.
-
Complete the required fields, if any.
-
Optionally, click Advanced to create a reconnection policy or expiration policy (options vary by connector).
-
If you made additional configuration changes in steps 8 or 9, click Save again.