To Run the Anypoint Platform Private Cloud Edition Installer
This topic describes how to run the Anypoint Platform Private Cloud Edition installer. This installer automatically configures much of the infrastructure required to run Anypoint Platform Private Cloud Edition. It automatically installs Kubernetes and creates multiple Docker containers that host the platform components.
|
Before running the installer, ensure that your system meets the minimum system requirements listed in About Minimum System Requirements. If your system does not meet these requirements, you cannot install Anypoint Platform Private Cloud Edition. |
The installer automatically validates requirements for disk space, disk speed, network speed and operating system version. You must run the installer in a single session without interruption. Restarting the installer may cause problems with the installation.
To Start the Installer
-
Obtain the
anypoint-1.5.2-installer.tar.gzarchive from your customer support representative. -
Uncompress the archive:
tar -xvf anypoint-1.5.2-installer.tar.gz
-
From the location where you unzipped the archive, run the following command:
./install
-
Select the IP address you want to use and confirm.
Based on your selection, the installer displays a message similar to the following:
OPEN THIS IN BROWSER: https://{HOST}:61009/web/installer/new/gravitational.io/anypoint/{VERSION}?install_token={TOKEN} -
Open the URL in a browser.
The installer runs on an internal IP that you can use to access from within your network. To access the URL from outside the network you must replace it with a public IP address.
To Run the Installer
After launching the installation wizard, perform the following steps to install Anypoint Platform Private Cloud Edition:
-
Enter your Anypoint Platform license key, then click Continue.
You must obtain the license key from your MuleSoft account representative.
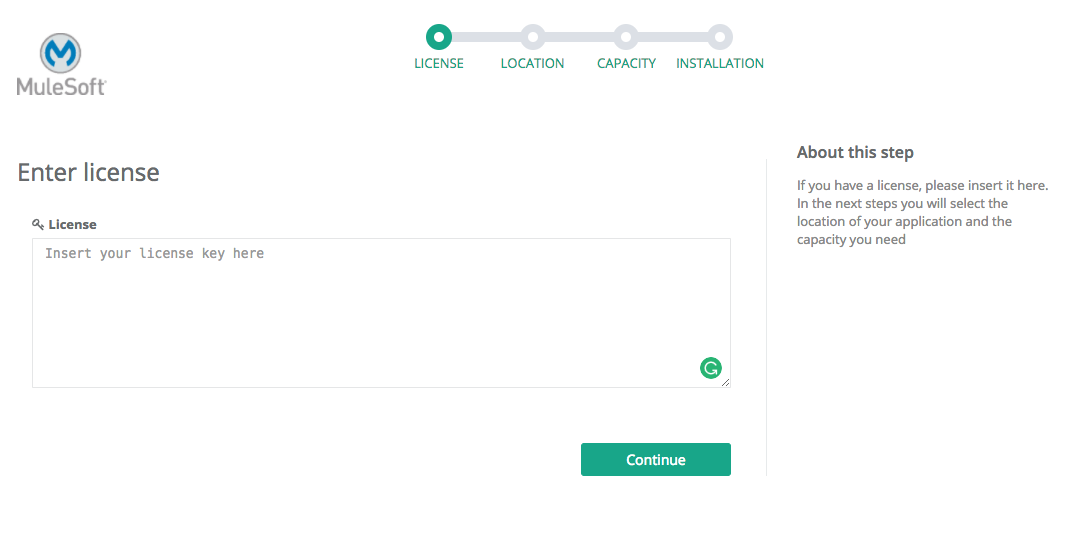
After applying a new license, it may take time for the installer to recognize the license.
-
Enter a name for your deployment.
-
Choose a provider, then click Continue.
The name you provide here does not affect the network address or organization name in Anypoint Platform.

-
Select an installation flavor and register each of your servers as nodes.
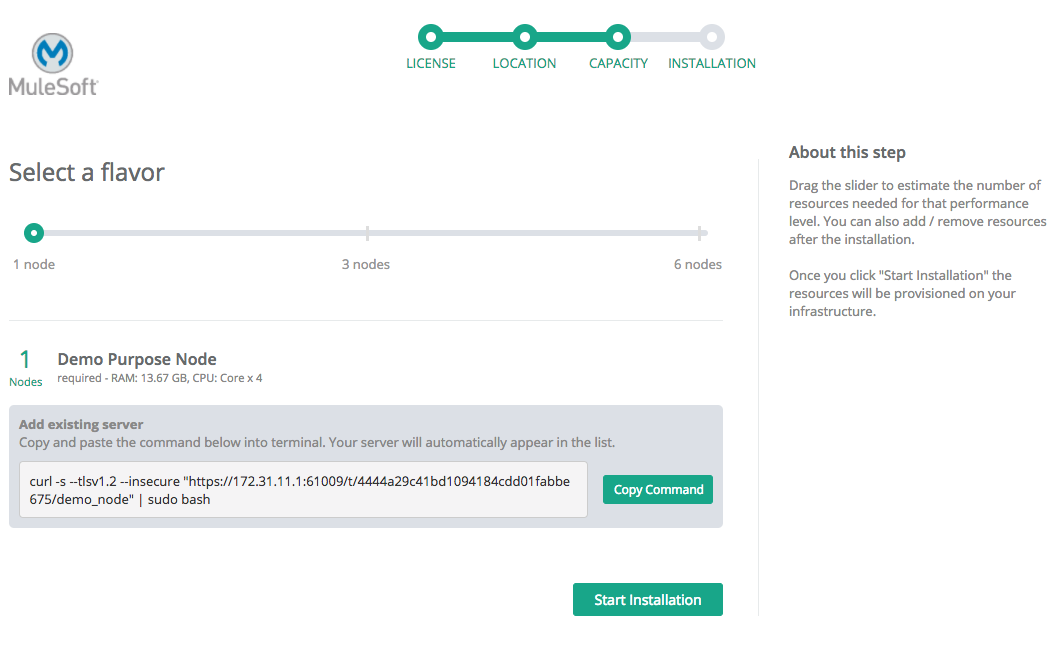
You can click or drag the slider to select the number of servers in your configuration. The following configurations are supported:
-
1-node configuration: installs all platform components run on a single node. This configuration is intended for demo purposes only and has lower hardware requirements. It is not supported for development or production environments. The demo installation includes its own LDAP server to use for testing. See Demo LDAP Server for details on what it contains and how to use it.
-
3-node configuration: installs and registers all servers as General Purpose Nodes.
-
6-node configuration: installs and registers three nodes as App-only and three nodes as Data Store.
See Supported Network Topologies for more information about the 3-node and 6-node configurations.
After installation, you can add or remove nodes as necessary using the Ops Center.
-
-
Register each of your servers as nodes.

-
Run the command displayed in Add existing server from the command line of each node in your installation.
You must have administrator privileges to run this command. The command should have the following structure, but varies depending on the selected installation flavor you select and the type of the node:
curl -s --tlsv1.2 --insecure "https://{HOST}:443/t/{TOKEN}/node" | sudo bash -
Configure IP addresses and devices.
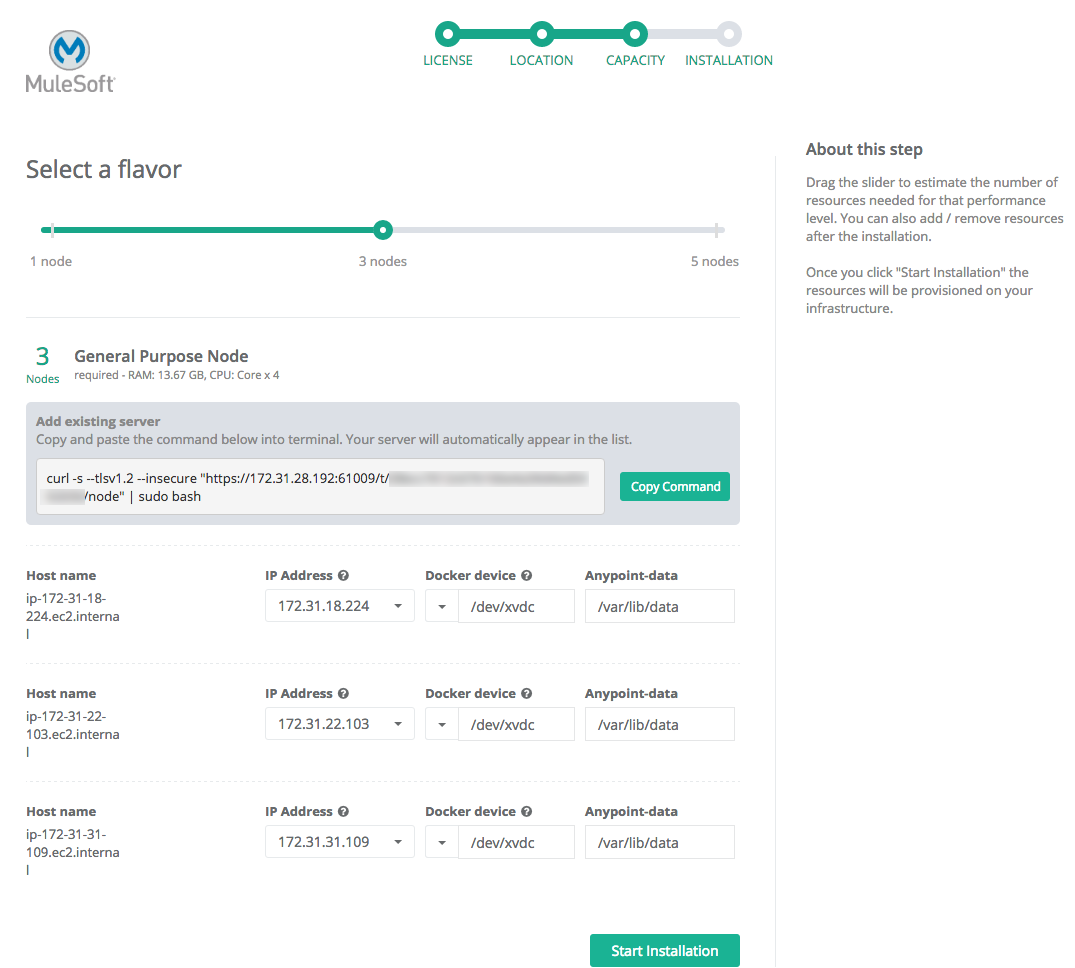
After running this command on a node, the node becomes visible in the installer’s UI. Each node has a set of fields to configure: an IP address and two devices to reference.
For your devices, you can either leave the default settings, or you can set up your own, see Device Requirements for details. Ensure that on each of your nodes, both devices are configured with enough space.
-
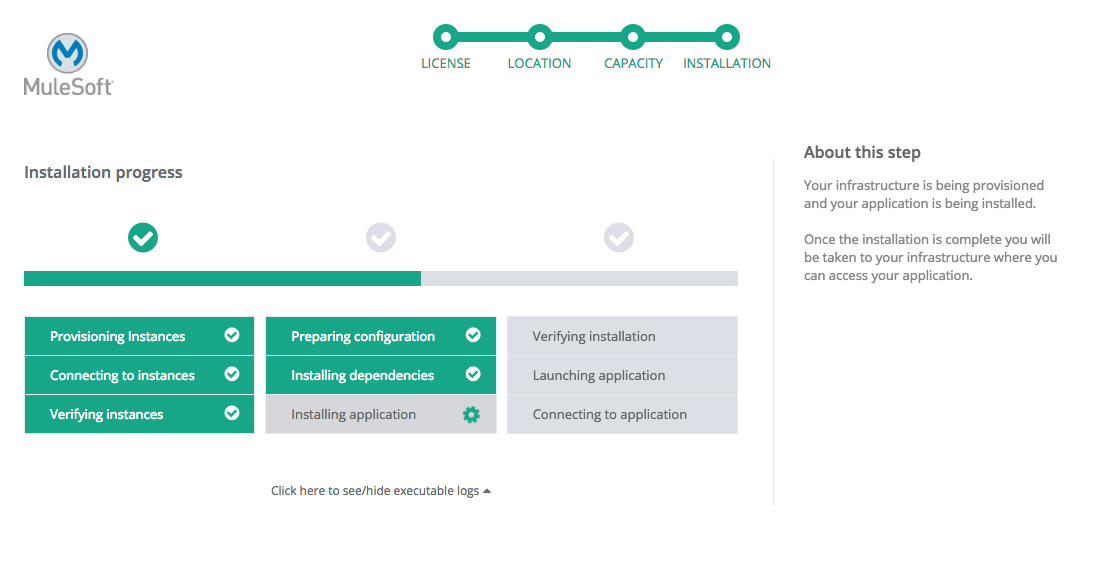
After all of your nodes are visible and configured, click Start Installation.

The installer passes through several different stages. Wait for this process to finish.
-
Enter the following organization and administrator data:
-
Organization name
-
Administrator email
-
Administrator username
-
Administrator password
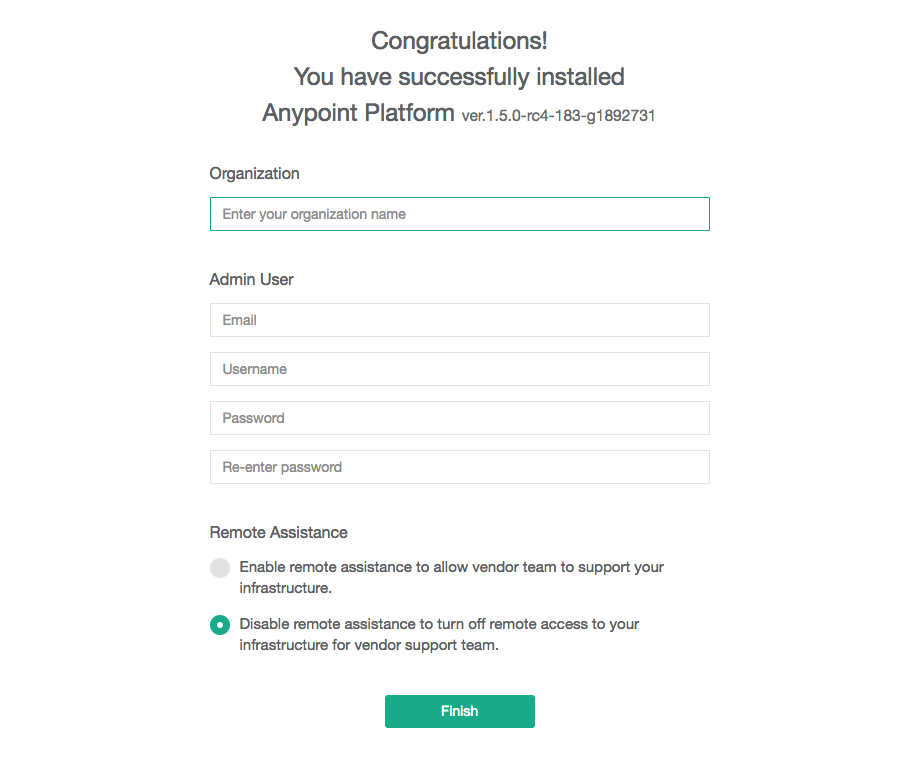
Platform users sign in to accounts that belong to the organization name that you provide here or a business group within it. See Organizations for more information.
-
To Uninstall and Reinstall
If you encounter encounter problems during installation, you can attempt to reinstall. Before beginning a new install, ensure that all remnants of the original installation have been removed by performing the following commands on all nodes:
# remove installed system components
sudo gravity system uninstall --confirm

# remount and clear platform data
sudo mount /var/lib/gravity
sudo rm -rf /var/lib/gravity/*

# remount and clear platform data
sudo mount /var/lib/gravity/planet/etcd
sudo rm -rf /var/lib/gravity/planet/etcd/*

# remount and clear application data
sudo mount /var/lib/data
sudo rm -rf /var/lib/data/*
Depending on the state of the full or partial install that you are replacing, these commands may not completely return the system to an installable state. Before beginning reinstall, ensure that your system is still setup correctly and meets the minimum disk and resource requirements.