Change the JDK from Studio
You can select any of your installed JDKs as the default Java runtime environment that Studio uses to run your Mule project.
|
Anypoint Studio 7.3 and later require JDK 1.8 to launch. These instructions change the JDK used to start up your Mule runtime in your Studio environment. |
Configuring the JDK Version for your Studio Projects
-
In Studio, click Anypoint Studio, and Preferences.
-
Under Java, Installed JREs, select the JDK version you want to use.
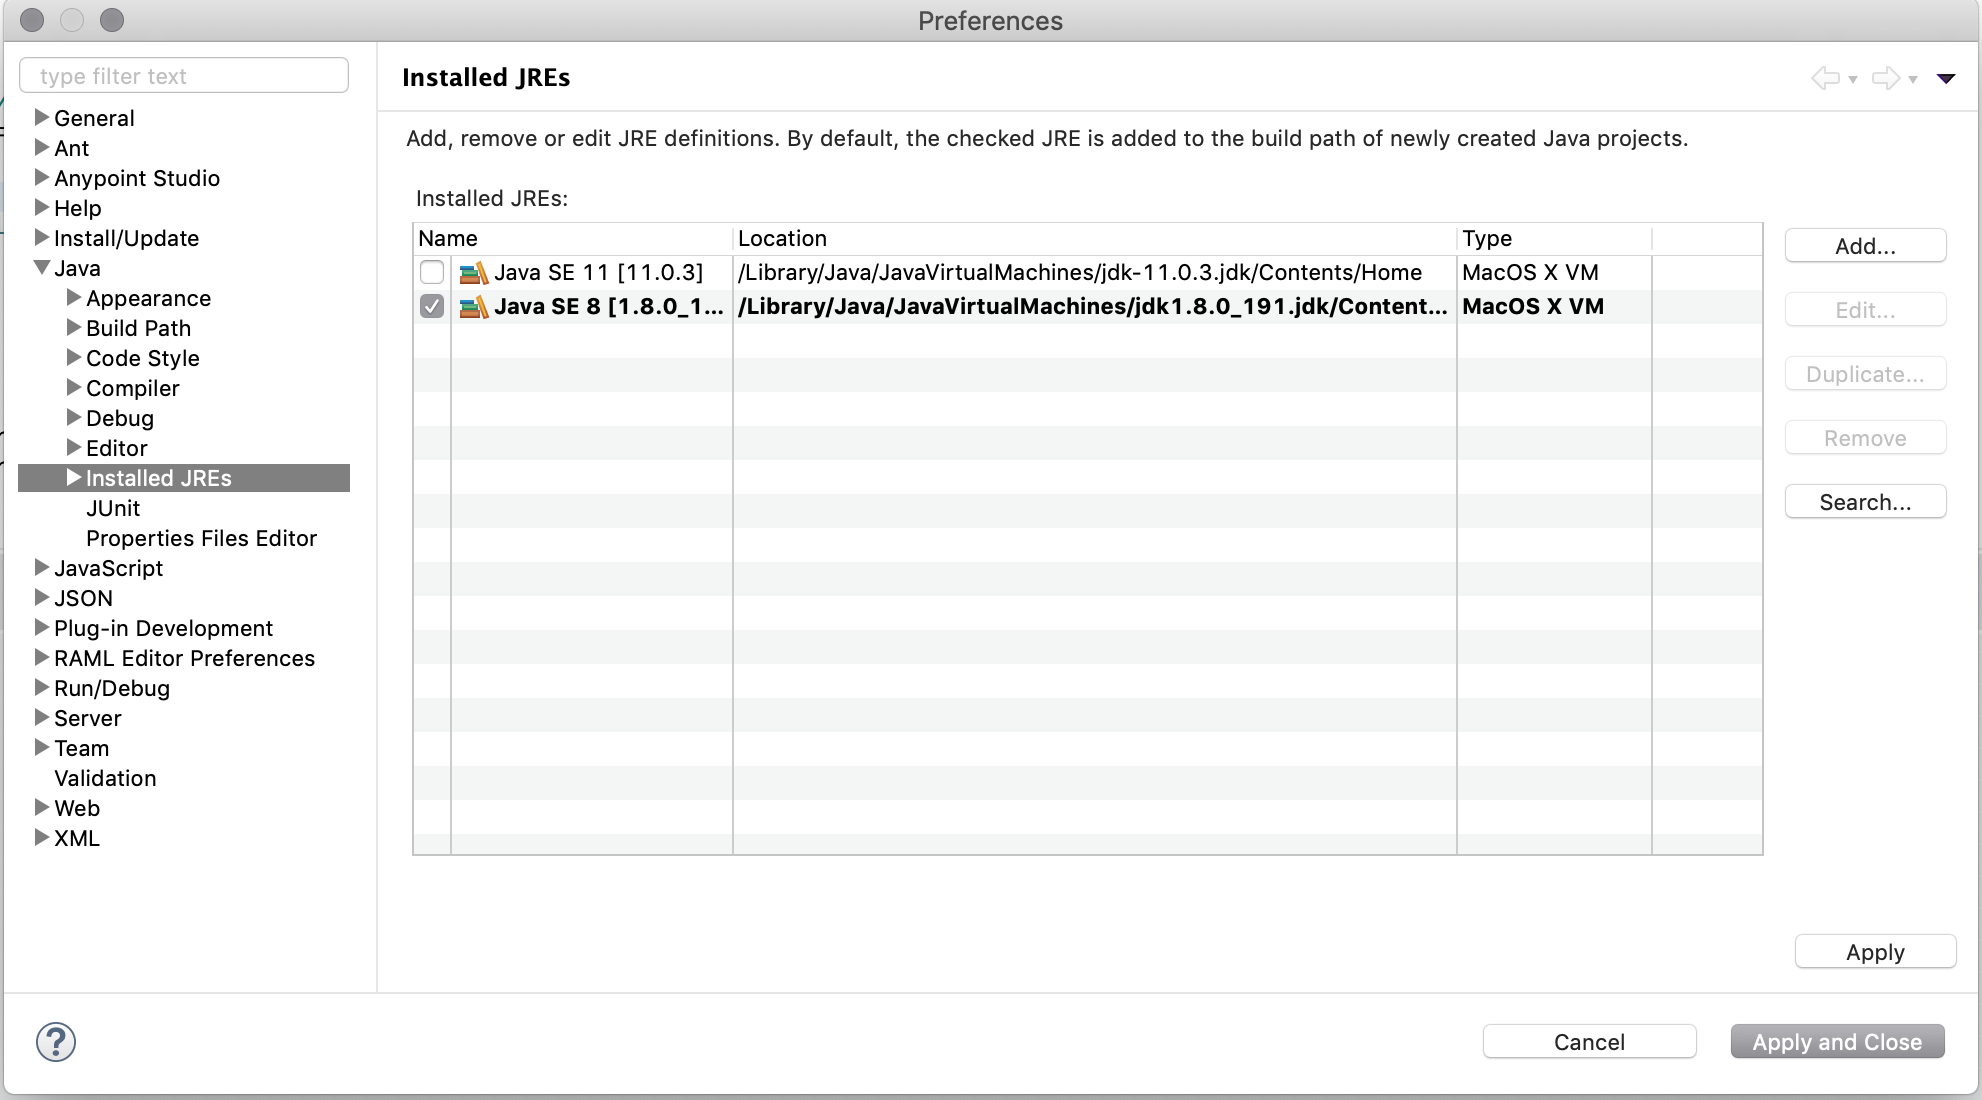
If your installed JRE version does not appear, you need to configure it:
-
Go to Add…, and select your type of installed JRE:
-
MacOS X VMfor MacOS. -
Standard VMfor Windows and Linux.
-
-
Click Next.
-
In the JRE Home, click Directory and select the folder where your JDK is installed.
For example,/Library/Java/JavaVirtualMachines/jdk-11.0.3.jdk/Contents/Home -
In JRE Name type in a descriptive name for the JDK.
For example,Java SE 11. -
Click Finish.
-
Configuring the JDK Version for a Specific Project
-
Right click in your Studio project.
-
Navigate to Build Path, and click Configure Build Path….
-
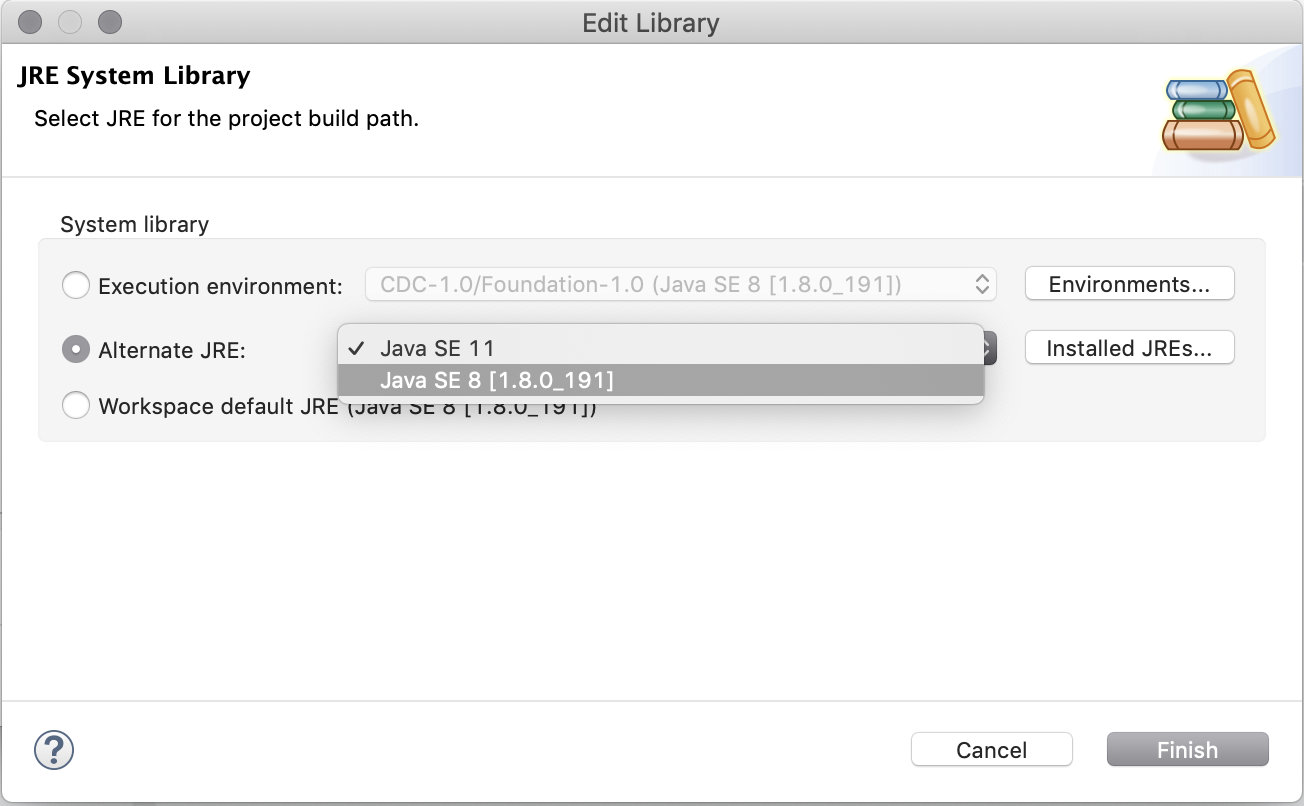
In the Libraries tab, select your JRE System Library and click Edit.
-
Select the Alternate JRE option, and select your desired JRE from the drop-down menu.