Studio Cloud Connectors
What is a Cloud Connector?
Studio bundles pre-packaged Cloud Connectors that facilitate easy integration of your Mule applications with third-party Web APIs.
As for most Studio building blocks, configuration consists of two easy steps:
-
Drag your building block (in this case, a Cloud Connector) from the Palette to the Message Flow canvas, placing it within the sequence of building blocks.
-
Configure the Cloud Connector by specifying values for the fields displayed on the various tabs of the Cloud Connector’s Properties pane.
About Cloud Connector Compatibility
Cloud Connectors developed prior to Mule ESB 3.2 can be deployed only with the version of Mule for which they were developed. In other words, these "legacy" Cloud Connectors are neither forward nor backward-compatible.
A complete compatibility list that includes both Studio-configurable and legacy (XML-configurable) cloud connectors appears here.
Legacy Cloud Connectors cannot be configured or deployed by Mule Studio, which debuted in Mule 3.2. Instead, you must configure all legacy Cloud Connectors with an XML editor, then deploy them exclusively with the Mule release for which they are listed as compatible.
Future Compatibility
Starting with (and including) Mule 3.2, MuleSoft intends to make all Cloud Connectors forward-compatible with all new releases of Mule. This group of Cloud Connectors, which are referred to as 3.2-compatible or Studio-compatible, can be configured either through the "plain English" Properties pane in the Studio visual interface, or through Studio’s built-in XML editor.
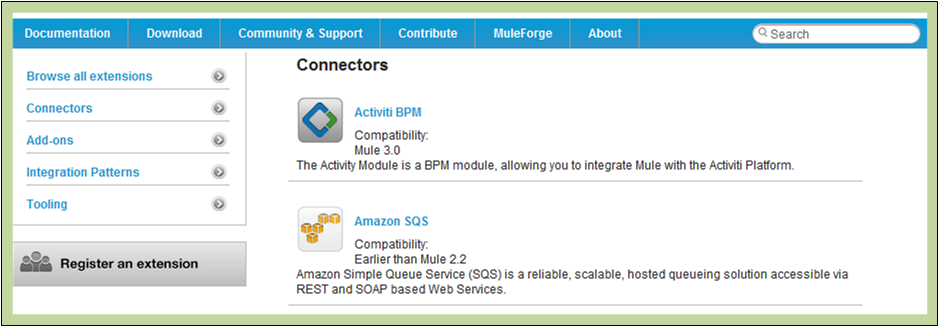
Studio-configurable Cloud Connectors
| Web Service API | Description | Reference | |
|---|---|---|---|
|
CMIS |
Supports enterprise Content Management systems (CMS) that adhere to the Content Management Interoperability Services (CMIS) specification. Using this connector, your Mule application can interact with any CMS system that implements CMIS. |
CMIS Cloud Connector Reference
|
Magento |
An e-commerce Web application based on open source technologies. |
Magento Cloud Connector Reference
|
Salesforce |
A Web-based API for querying, creating, and updating information within Customer Relationship Management (CRM) software from Salesforce. |
Salesforce Cloud Connector Reference
|
An online API service that supports Web-based social networking and micro-blogging. |


Configuring Cloud Connectors
This section covers the configuration procedures common to all Studio-compatible Cloud Connectors. For information on Studio’s general interface features, see: Configuring Building Blocks. For configuration information specific to individual Cloud Connectors, see the Reference column in the table titled: Studio-configurable Cloud Connectors.
To initiate configuration, double-click the Cloud Connector icon on the Message Flow canvas, or right-click on the icon, then select Properties from the context menu.
Setting the Display Name
Display name appears as the first field on the General tab of the Properties pane for each Cloud Connector (See: below, left and below, right). Although you can accept the default, which is the name of the Web service API enabled by the Cloud Connector, the Display name field offers an opportunity to create a meaningful Cloud Connector name that appears in the XML configuration file and under the Cloud Connector icon on the Message Flow palette. For instance, you can change "Mongo DB" to "DB Admin Dashboard for Mongo".
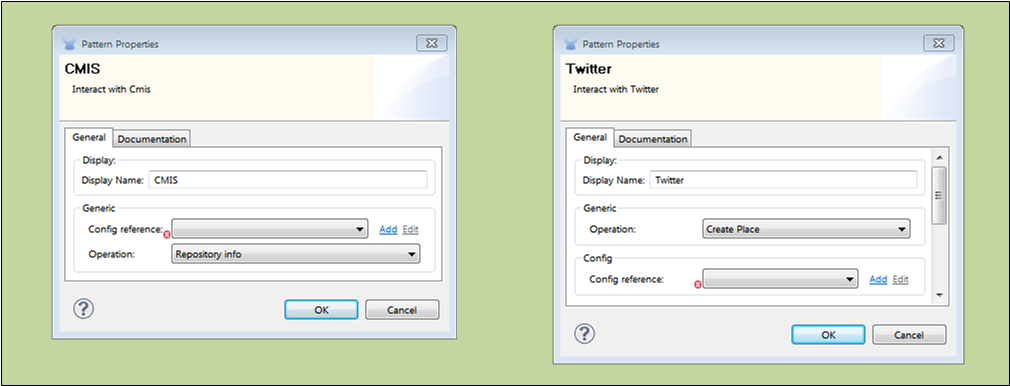
Setting the Config Reference Property
Before you create a Studio Cloud Connector of a certain type (i.e., CMIS or Twitter, etc.) for the first time, you must create a template or Global Element that you can reuse each subsequent time you create a Cloud Connector of that type. Two procedures exist for creating this global element for a Cloud Connector that connects to a specific Web service API. This section covers only the more direct procedure. (For details on the other, more general procedure see: Configuring Global Mule Elements)
For every Cloud Connector on the Studio Palette, you set the Config reference property by specifying a global element along with certain API-specific information.
For some Cloud Connectors, such as CMIS (See: above, left), Config reference appears in the Generic group on the General tab of the Properties pane. For others, such as Twitter (See: above, right), Config reference appears in the Config group on the General tab of the Properties pane.
Creating the Global Element
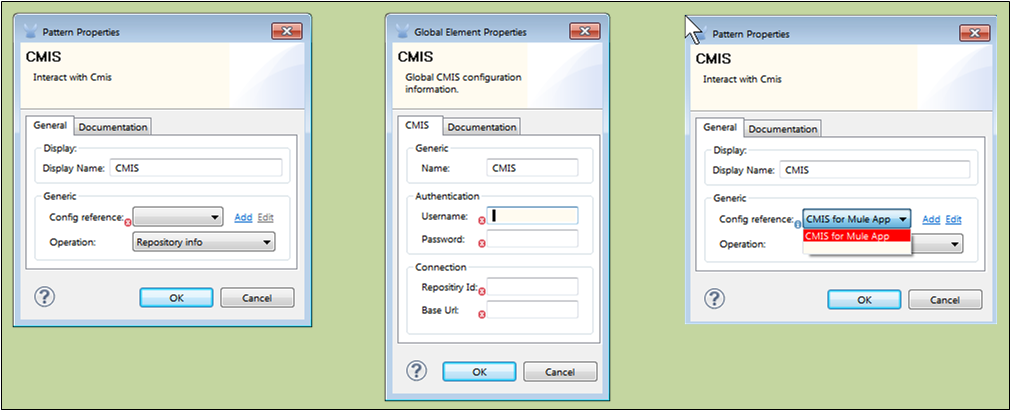
Click the Add button, which exists to the right of the Config Reference field on the General tab of the Properties pane for the CMIS Cloud Connector (See: below, left).
After the Global Element configuration pane appears, complete the fields marked by "x" in a small red circle (See: below, center). As for most Cloud Connector global elements, the requisite fields for CMIS include authentication credentials (in this case, Username and Password) and connection information (in this case Repository ID and Base URL). You can find details for specifying and formatting this information on either the Cloud Connector reference page or on the reference page for the Web service API, to which there is a link on the Cloud Connector reference page. Click OK to commit the information you have entered in the fields.
Specifying an Existing Global Element
If you have configured only one global element for this type of API-specific Cloud Connector, it will appear in the Config reference field (See: above, right).
If more than one global element exists, click the arrow icon to the right of the Config reference field, then select the appropriate global element from the drop down list (See: above, right).
In the case of CMIS, you need to specify an operation (API call) for the Cloud Connector to implement. Click the arrow to the right of the Operation field and select an item. For other API-specific Cloud Connectors, such as Salesforce, you may need to specify many additional attributes to complete configuration. For guidance, consult either the Cloud Connector reference page or the reference page for the Web service API.
Click OK to commit your field choices.